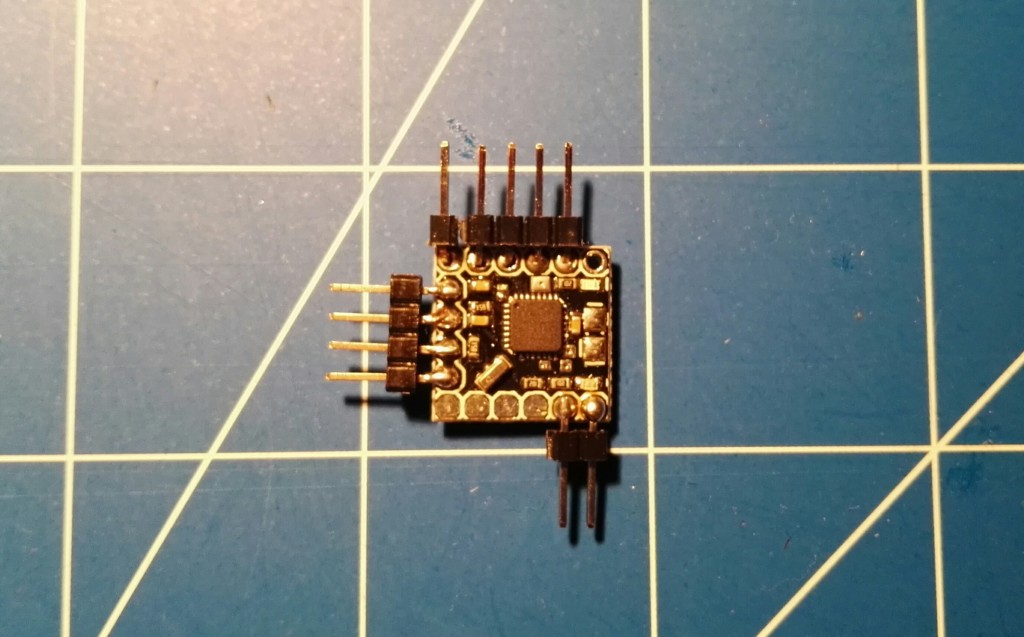
How to flash MW OSD to Micro MinimOSD
While playing with newly arrived Micro MinimOSD and attempting to flash it with latest MW OSD software, I've discovered that offical tutorial, as well as many other are missing one tiny detail that makes whole process much harder than expected. In theory, MinimOSD just Arduino Pro Mini with additional hardware. So, in theory, you plug in your FTDI USB adapter and upload a sketch. But if you never worked with Arduino Pro Mini (like me, it was always Uno, Pro Micro, or barebone Atmega328) you might not know one detail. Yesterday it took me more than 30 minutes to figure out firmware upload is not working, while it should. So, another tutorial will be written.
To flash MW OSD to Micro MinimOSD we will need:
- Micro MinimOSD with soldered pins, but isn't this obvious?
- USB to Serial cable adapter like FTDI FT232RL with drivers installed,
- MW OSD software downloaded,
- Arduino software,
- 5 female-to-female golpin wires,
- connect FTDI adapter to MinimOSD
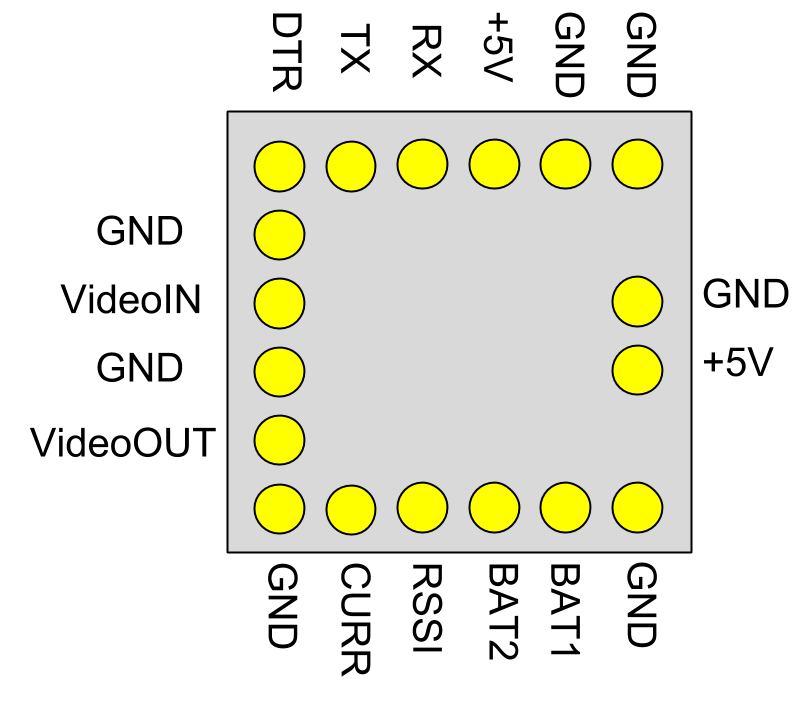
MinimOSD FTDI GND GND 5V 5V RX TX TX RX DTR DTR 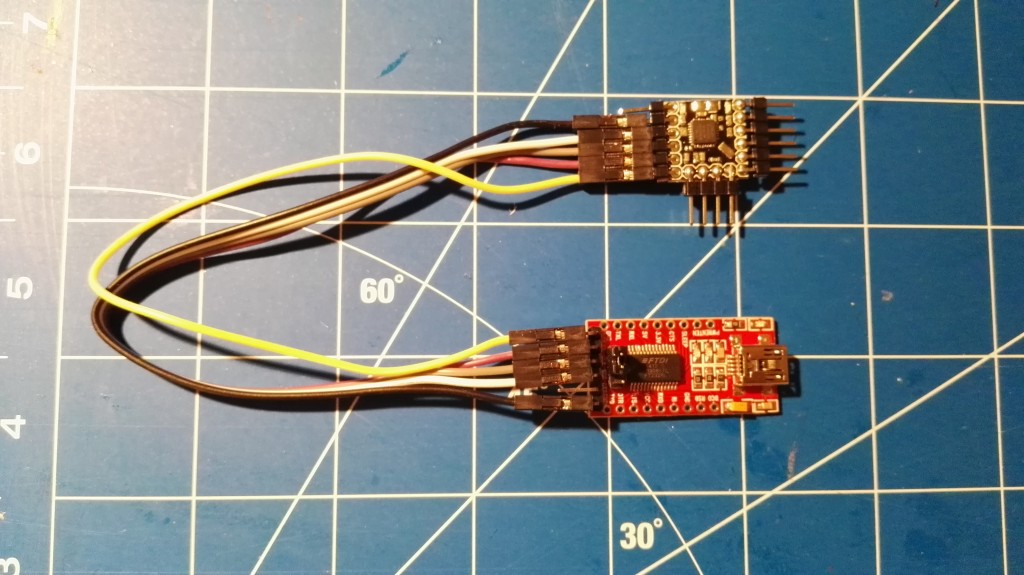 The thing that most of tutorials ommit, is DTR line. Without it programming Atmega on MinimOSD with Arduino bootloader will fail. Obvious for people using Arduino Pro Mini. Not so obvious for all the other,
 - Connect FTDI USB to Serial adapter to a PC,
- Open Arduino software and open WM_OSD.ino from MW OSD software package,
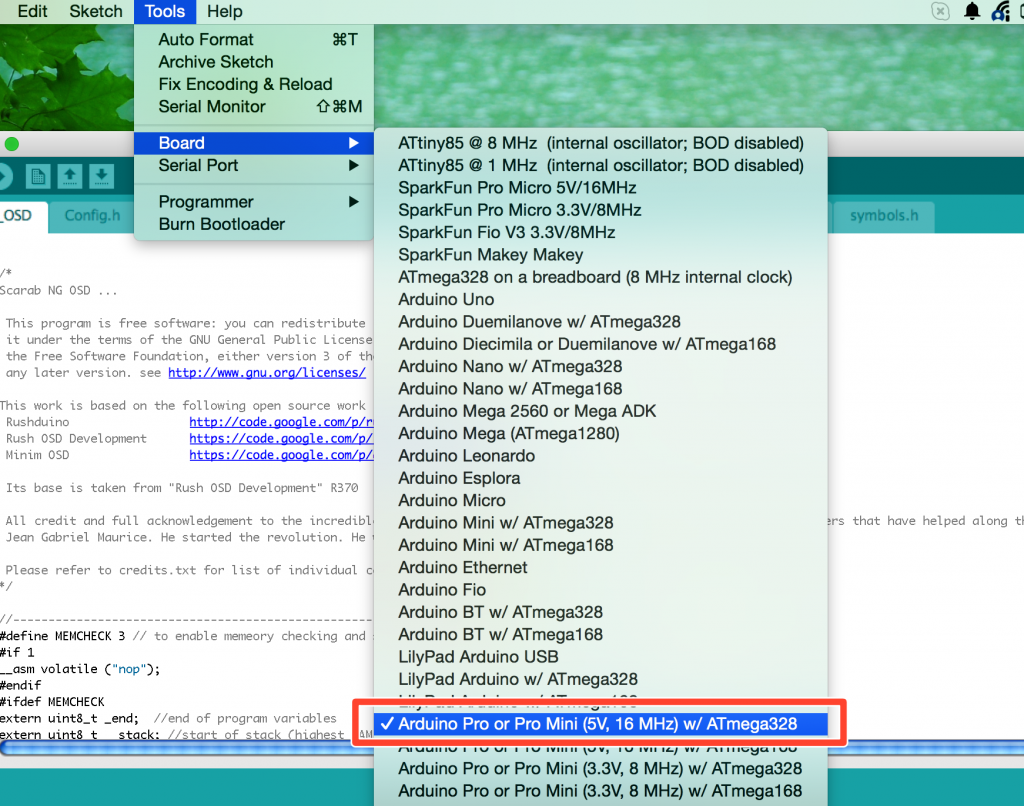
- Select board: Arduino Pro or Pro Mini (5V, 16MHz) w/ Atmega328
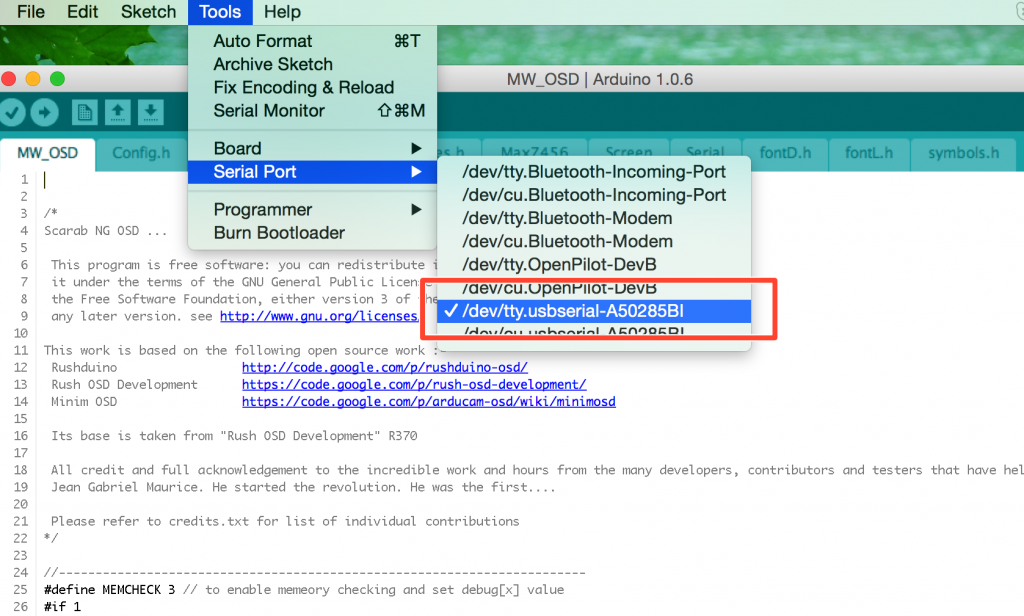
- Select correct Serial port. For Windows users it will be one of COMs, for Linux and Mac /dev/tty.*
- Press Upload button and this is all. MinimOSD will be flashed with latest MW OSD software and will be ready to connect to configuration software that comes with MW OSD software package. But I will write about this next time...

I'm Paweł Spychalski and I do things. Mainly software development, FPV drones and amateur cinematography. Here are my YouTube channels:

