Flip32 with broken USB port
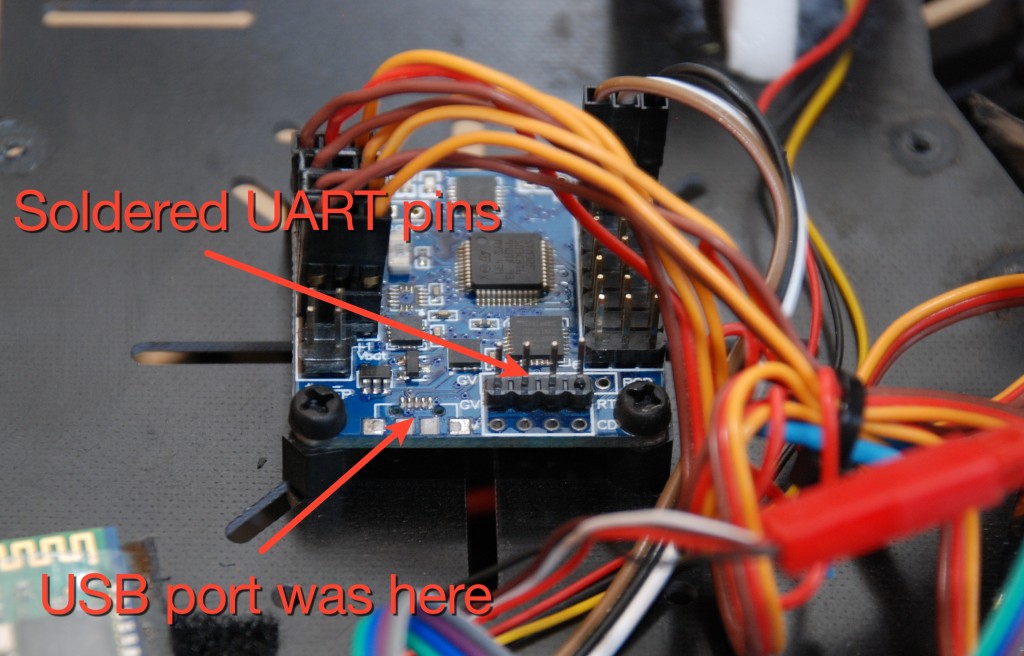
Low price equals low quality. At least usually. I became clear to me (again) when I've broken USB port on my Flip32+ multirotor flight controller. I've pulled USB cable and USB socket stayed on a plug. Cheap solder. Or too quick soldering. No idea. Bottom line: unable to connect to flight controller board using USB cable. To make things worse, quadcopter was not tuned yet. It was flying, but not in the way I wanted it to.
What are the options in this case? Well, there are 3:
- get new flight controller board. Quite expensive since the only thing that is broken is USB port itself. Everything else works just fine,
- resolder USB socket. Might be the best solution, but since it's surface mounted micro USB, it's way above my soldering skills. THT? Why no prob. Simple SMD like resistor? Why not. More advanced? No...,
- use different way to communicate with flight controller.
I've chosen the third way. Flip32 (and Naze32) has build in hardware UART ports (as well as SoftwareSerial) that can be used to establish connection with a PC. Software like Cleanflight already allows you to use any serial port to talk to flight controller.
OK, board has UART. What about PC? Does it have one? Well, it depends. Usually it does not have a port that we can directly connect to UART. But there are two ways to fix that:
- use USB-to-serial cable/adapter. Like FTDI,
- use Bluetooth with serial interface connected to Flip32 and use your laptop's (or even smartphone) Bluetooth to talk to flight controller. This is very nice solution, since it's wireless telemetry. Cheap HC-06 Bluetooth module is widely used.
In this entry I will describe first solution, with USB to serial interface. Plus, in a future, if we want to use Bluetooth, we will still need FTDI to configure it. So, let's begin:
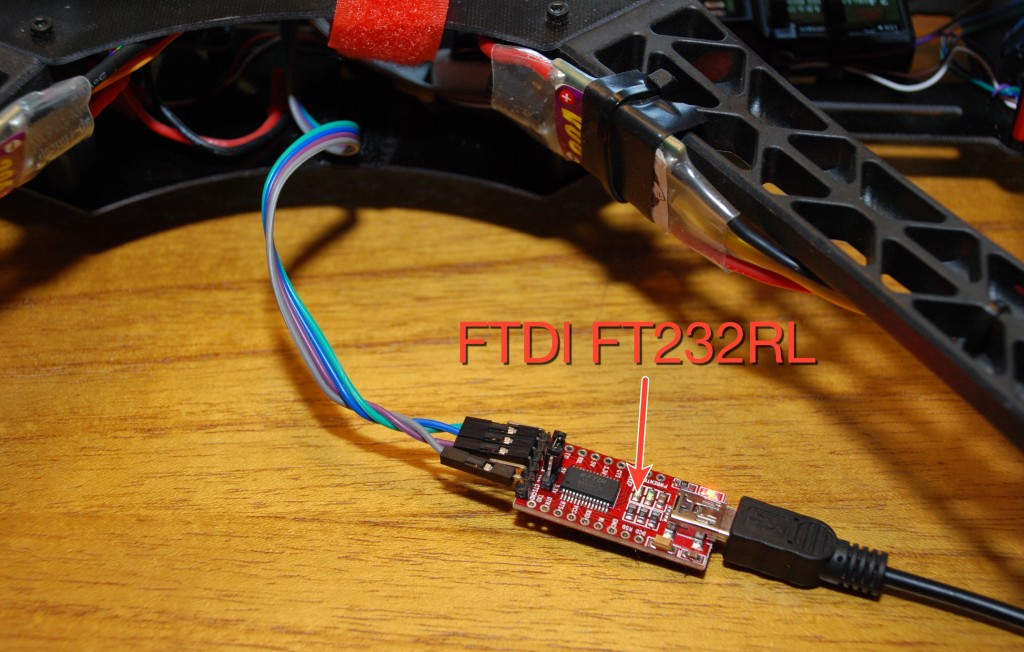
- If you do not have it already, buy USB to serial interface. For example FTDI FT232RL from China on eBay. They cost below $3. The only problem is that you have to wait a few weeks. Or visit local electronics store, ask friends. Maybe they already have it.
- By default, UART1 port connectors are not soldered to Flip32 board. So you have to solder them. Use 4 goldpins and solder them carefully to RT port.

- Connect FTDI to your PC and install drivers if required. In case of FTDI FT232RL chipset, this page can be used to download required drivers. At the on of process, you PC should see new serial port (COM in case of Windows, /dev/tty* in case of Linux and Mac)

- With FTDI disconnected from PC, and Flip32 disconnected from battery (ensure no power on both sides) connect Flip32/Naze32 with FTDI in following order:
Flip32 FTDI GND GND 5V 5V RX TX TX RX Yes, RX and TX should be swapped. This is correct. On FTDI, all connectors are described, so this is not a problem. On Flip32 side, they are not. In case of RT port, with GV on left side, they goes as follows, from left to right: GND, 5V, RX, TX
- Connect FTDI to PC, run Flip32 configuration software (Cleanflight for example)
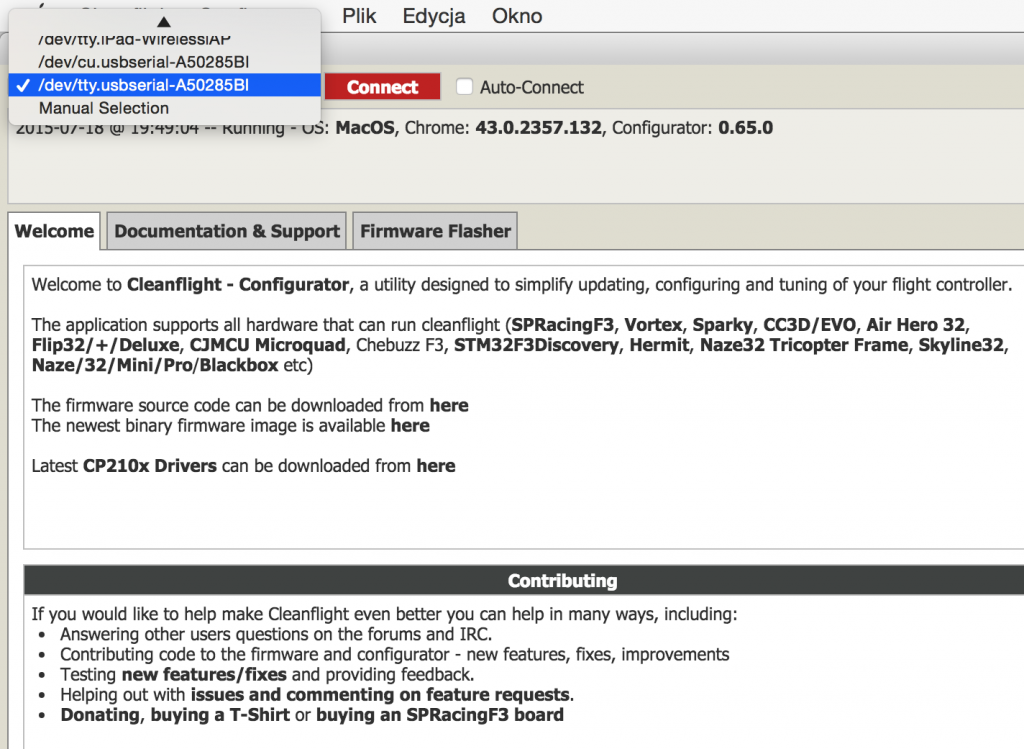
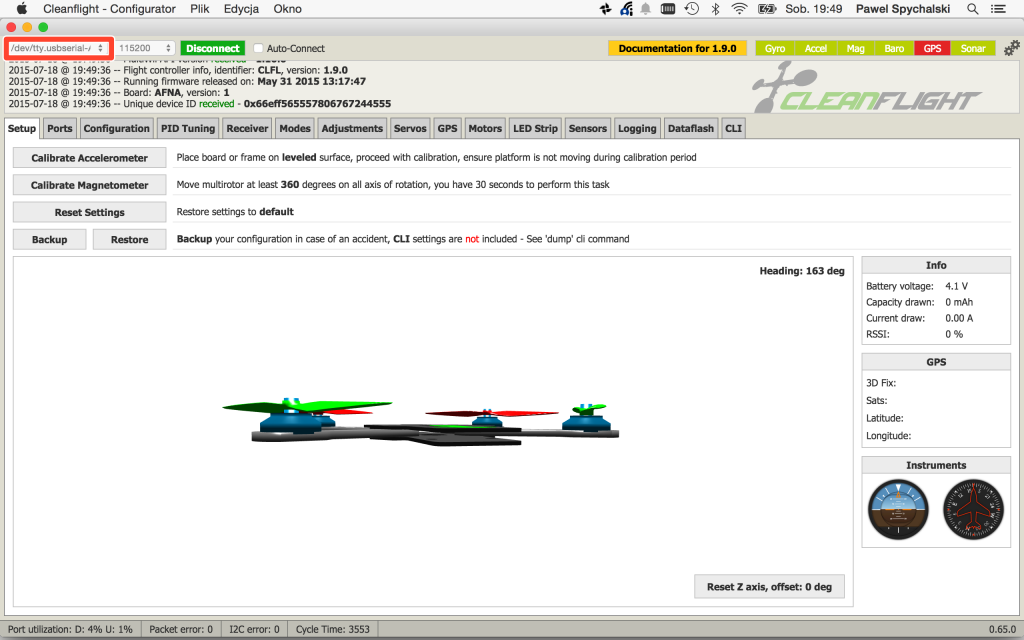
- Select FTDI COM/TTY port, set 115200 port speed and click "Connect"

This is all. No further steps are required. You can configure Flip32 multirotor flight controller without USB.

I'm Paweł Spychalski and I do things. Mainly software development, FPV drones and amateur cinematography. Here are my YouTube channels:

