Programming ATtiny85 and ATtiny45 with Arduino IDE
What is ATtiny
ATtiny is a fimily of microcontrollers by Atmel, the same company that provides ATmega series used widely in "real" Arduinos. Comparing to ATmega, ATtinys are much simpler, smaller (usually), with less features. But also cheaper, easier to connect, using less energy, and trust me, in many many cases you do not need 32kB of flash memory. If, for example, you want to build a device that will beep every 10 minutes which microcontroller would you use: huge DIP-28 ATmega328P from Arduino UNO R3 or small DIP-8 ATtiny25 that ususes way less power and costs around 1EUR? I would use ATtiny.

There are many microcontrollers in ATtiny family. In this tutorial and all future in this series I will concentrate on ATtiny85 with 8kB of flash memory. There are 2 simpler versions of it: ATtiny25 and ATtiny45 with respectively 2kB and 4kB of flash, but price difference between them is so small, that I see no point of trying to use them. When buoght from China, it might be even possible to buy ATtiny85 cheaper than its smaller brothers.
ATtiny as a smaller Arduino
The coolest thing about ATtinys, is that they can be programmed using Arduino IDE. No need for new tools or libraries. Use the same development environment as for Arduino. There are even ready development boards like Digispark from Digistump based on ATtiny and "Arduino compatible". Of course they are not 100% compatible with real Arduino. Less flash memory, less timers and so on. But many programs developed for "real" Arduino can be easily adapted to run on, for example, ATtiny85.
What we will need:
- Arduino IDE, here I suggest latest from 1.6.x family (1.6.7 at the moment of writing this post),
- ATtiny hardware definitions. There are at least few available, I usually use those. They can be installed either directly by placing them in Arduino/hardware folder, or by Boards Manager by adding
https://raw.githubusercontent.com/damellis/attiny/ide-1.6.x-boards-manager/package_damellis_attiny_index.jsonin Settings -> Additional Boards Manager URLs and installing in Boards Manager, - ATtiny. Like I wrote before, I suggest ATtiny85 for starters. Cheap and powerful enough,
- Something to program our ATtiny. Since there is no USB, external programmer can be used. See next paragraph for details,
Choosing a programmer
Development Arduino "compatible" boards like Digispark are equipped with USB port at the cost of "few" bytes of flash memory reserved for special bootloader. This simplifies whole programming process, but it is not needed. Pure ATtiny with programmer is enough. Here we have few choices:
- Arduino UNO as programmer. If you already have Arduino, this is starters choice. All you need is few cables, Arduino UNO and capacitor. Works, but soon you will want something better. Read here how to do it,
- ATtiny only, dedicated programmer. Better, but what if you want to program something else?
- USBasp, my favourite choice here since it allows to program almost all AVR microcontrollers,
Programming ATtiny85/45/25 with Arduino IDE 1.6.x
- I assume that you already installed hardware definitions for ATtiny microcontrollers,
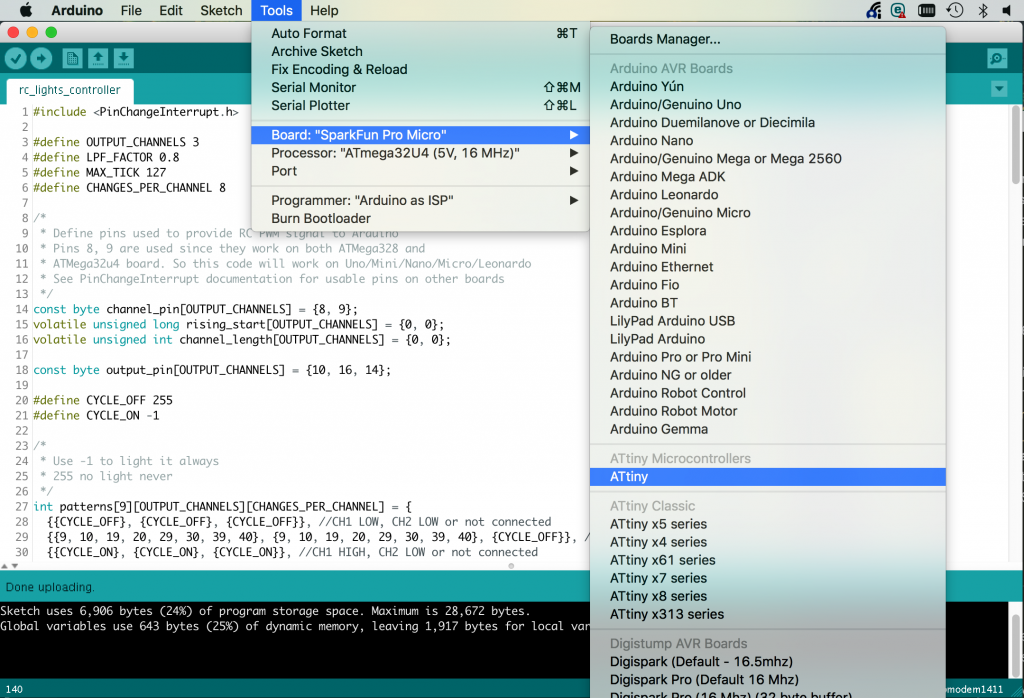
- Open boards menu and select ATtiny
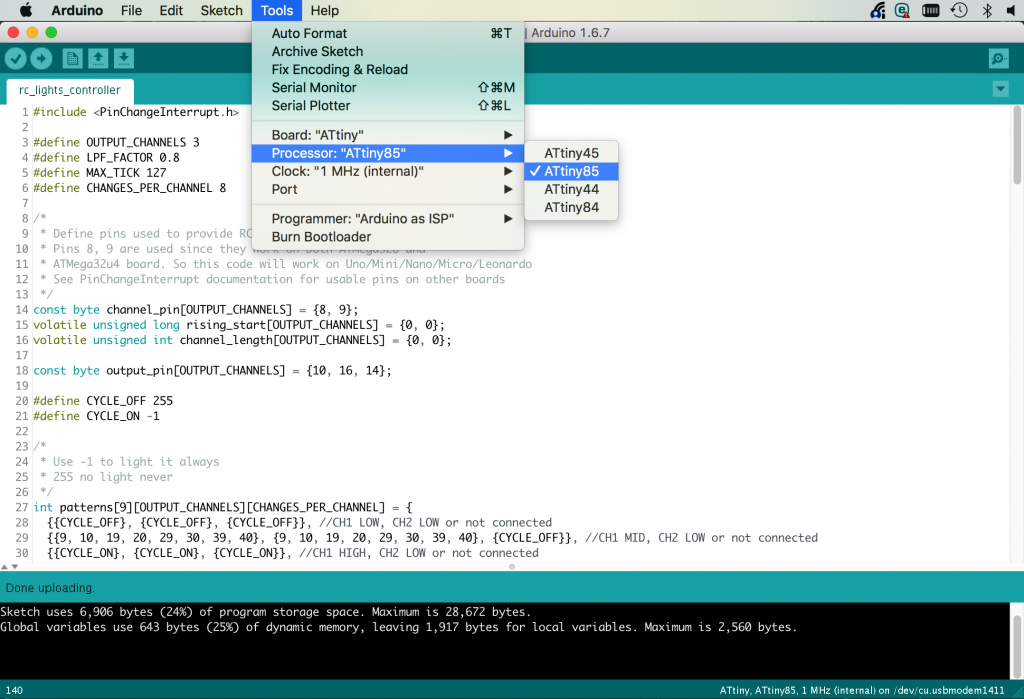
- Choose processor type from list: ATtiny 45, 85, 44, 84
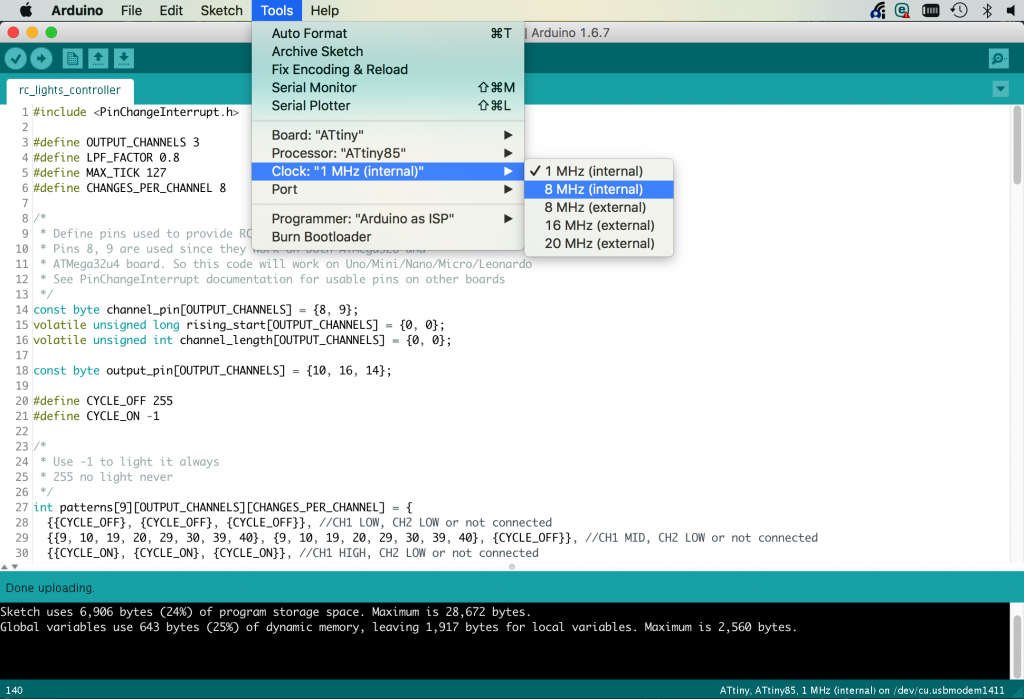
- Select clock speed. ATtinys can be configured to use internal oscillator at speeds of 1MHz and 8MHz. In this configuration you do not need any additional elements to run them. For higher speeds (16MHz and 20MHz) external oscillator has to be used. Some features like SoftwareSerial might not be working at 1MHz,
- When using USBasp you do not have to select COM port,
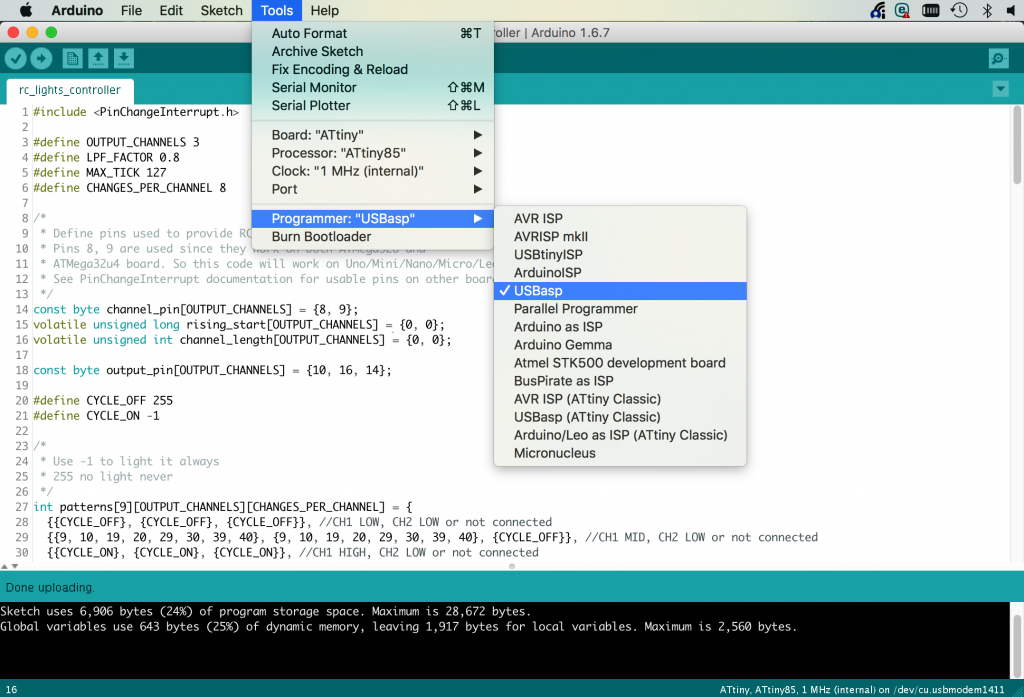
- Select programmer type: ArduinoISP, USBasp or any other you are using,
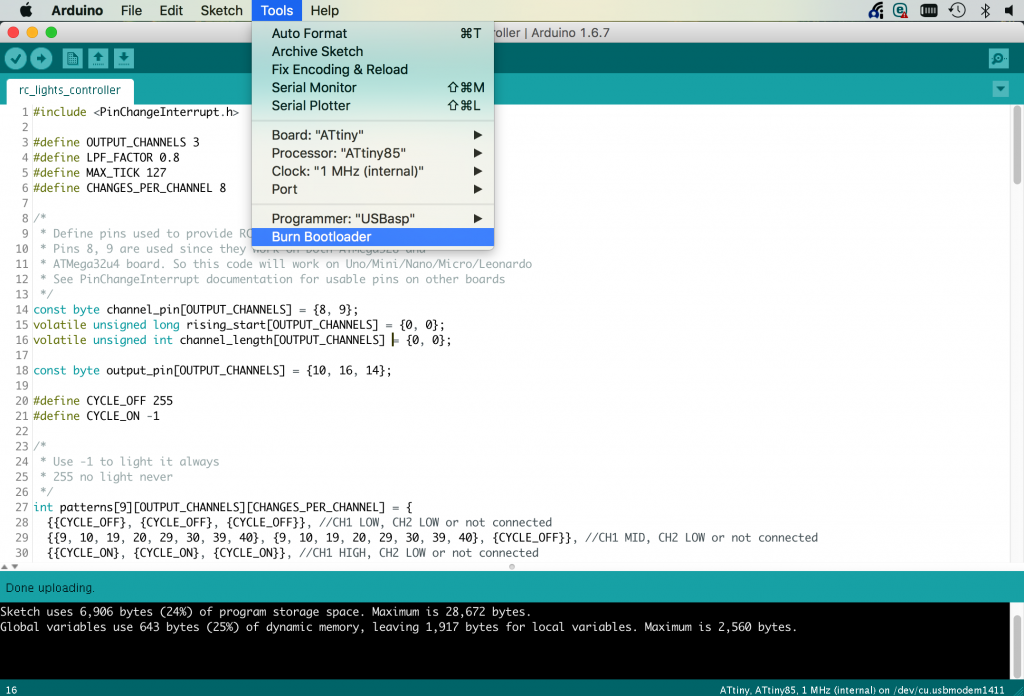
- Click Burn bootloader for any new chip. This has to be done for every new chip, and after each clock speed change,
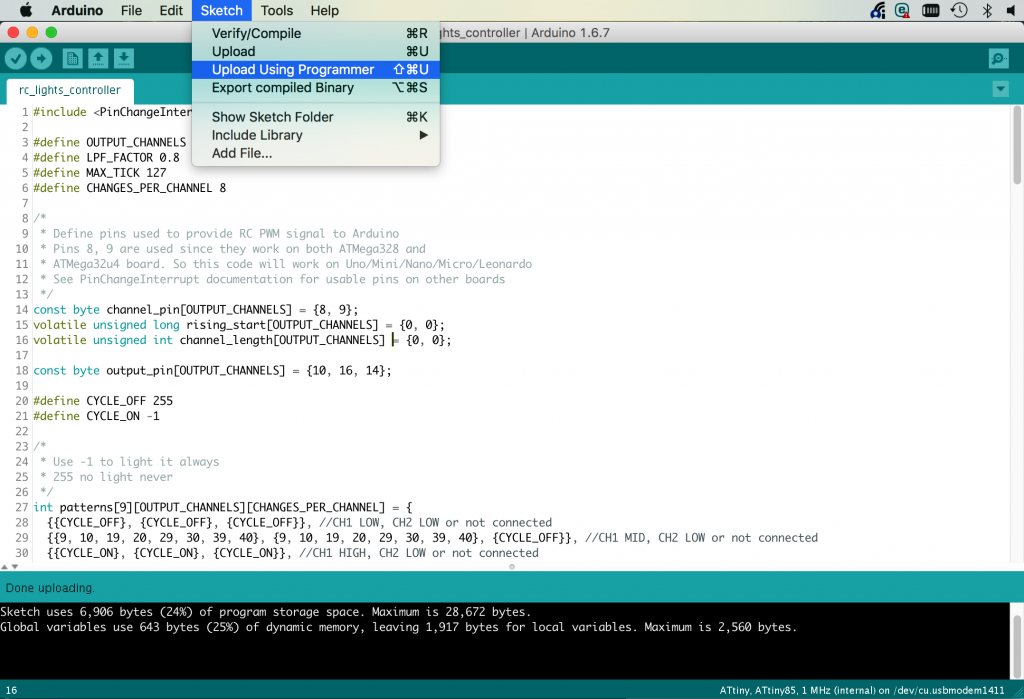
- From Sketch menu select Upload using programmer.
That is all. If everything was fine, ATtiny will be programmed with your code and working. If not, well... If sketch upload worked and program was compiled, you are probably facing one of those small incompabilities. Usually SoftwareSerial library and USB to UART converter helps with debugging.


I'm Paweł Spychalski and I do things. Mainly software development, FPV drones and amateur cinematography. Here are my YouTube channels: