-
ATtiny85 Light Sensor - I2C slave device
I love AVR ATtinyx5 series microcontrollers. They are cheap, easy to use, they can be programmed just like Arduinos and comparing to their size they offer great features. For example, they can be used as a remote analog to digital converters connected to a master device using an I2C bus.
Background: A few years ago I've built a weather station based on Raspberry Pi. It collects various data and displays them on a dedicated web page and Android app. Every few months I try to add a new sensor to it. Last time it was a daylight sensor. Raspberry Pi does not offer ADC inputs and I had a few ATtiny85 on hand tat hand. One to another, a few hours later: a photoresistor based daylight meter sensor connected via the I2C bus.
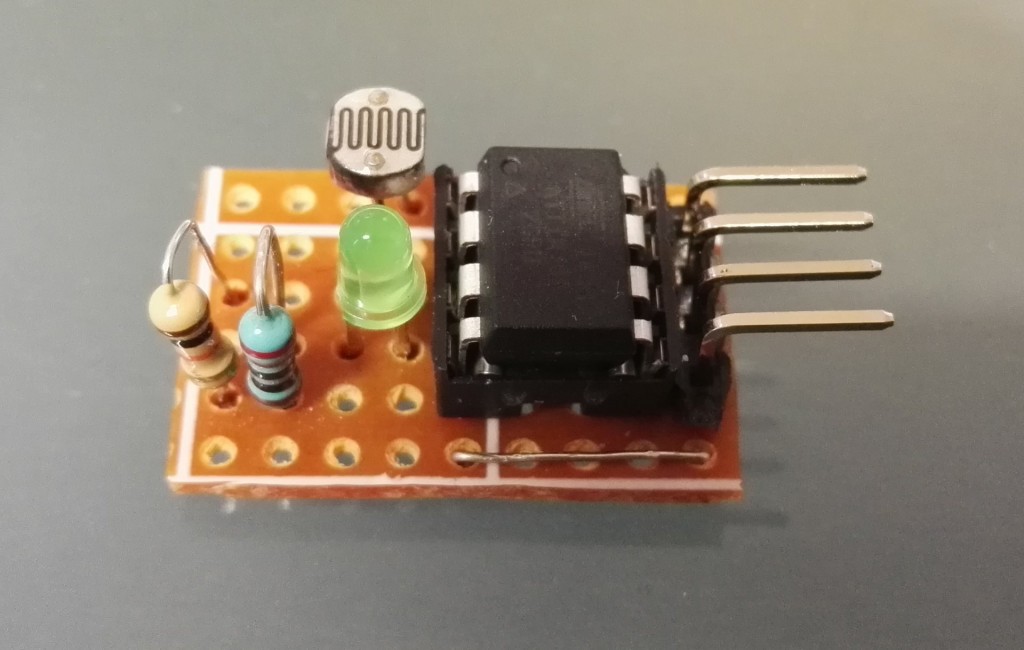
Electric assembly is pretty simple: ATtiny85 directly connected to Raspberry Pi via I2C, photoresistor with 10kOhm pull down connected to ATtiny85 and signal LED.

Code driving this rig is also pretty simple: watchdog timer wakes up ATtiny85 every few minutes, measures voltage, filters it and stores in memory. Every time read operation is requested, last filtered ADC value (10 bits as 2 bytes).
I2C support is provided by TinyWireS library that configures USI as an I2C slave.
/** * This function is executed when there is a request to read sensor * To get data, 2 reads of 8 bits are required * First requests send 8 older bits of 16bit unsigned int * The second request sends 8 lower bytes * Measurement is executed when a request for the first batch of data is requested */ void requestEvent() { TinyWireS.send(i2c_regs[reg_position]); reg_position++; if (reg_position >= reg_size) { reg_position = 0; } } /* * Setup I2C */ TinyWireS.begin(I2C_SLAVE_ADDRESS); TinyWireS.onRequest(requestEvent); //Set I2C read event handler `</pre> Example code to read from device might look like this: <pre>`Wire.requestFrom(0x13, 2); // request 2 bytes from slave device #0x13 int i =0; unsigned int readout = 0; while (Wire.available()) { // slave may send less than requested byte c = Wire.read(); // receive a byte as character if (i == 0) { readout = c; } else { readout = readout << 8; readout = readout + c; } i++; } Serial.print(readout);Full source code is available on GitHub and my Weather Station with almost a year of light level history is available here.
Read more... -
JJPRO P175: maiden FPV flight
Since weather in Central Europe is rather typical for this time of year (rain, wind, wind and rain), I was unable to get any decent video footage from JJPRO P175 quadcopter yet.
Instead of that, here are few minutes of video from maiden FPV flight:
It is fast!
Read more... -
BLHeli Configurator Preview
While BLHeli was the best what happened to ESCs since original SimonK firmware, BLHeli has one very serious flaw: BLHeliSuite works only on Windows operating system. Let's be honest here, this sucks. OK, one can use virtual machine and some people succeeded to run it using WINE (I failed) but those are not good solutions.
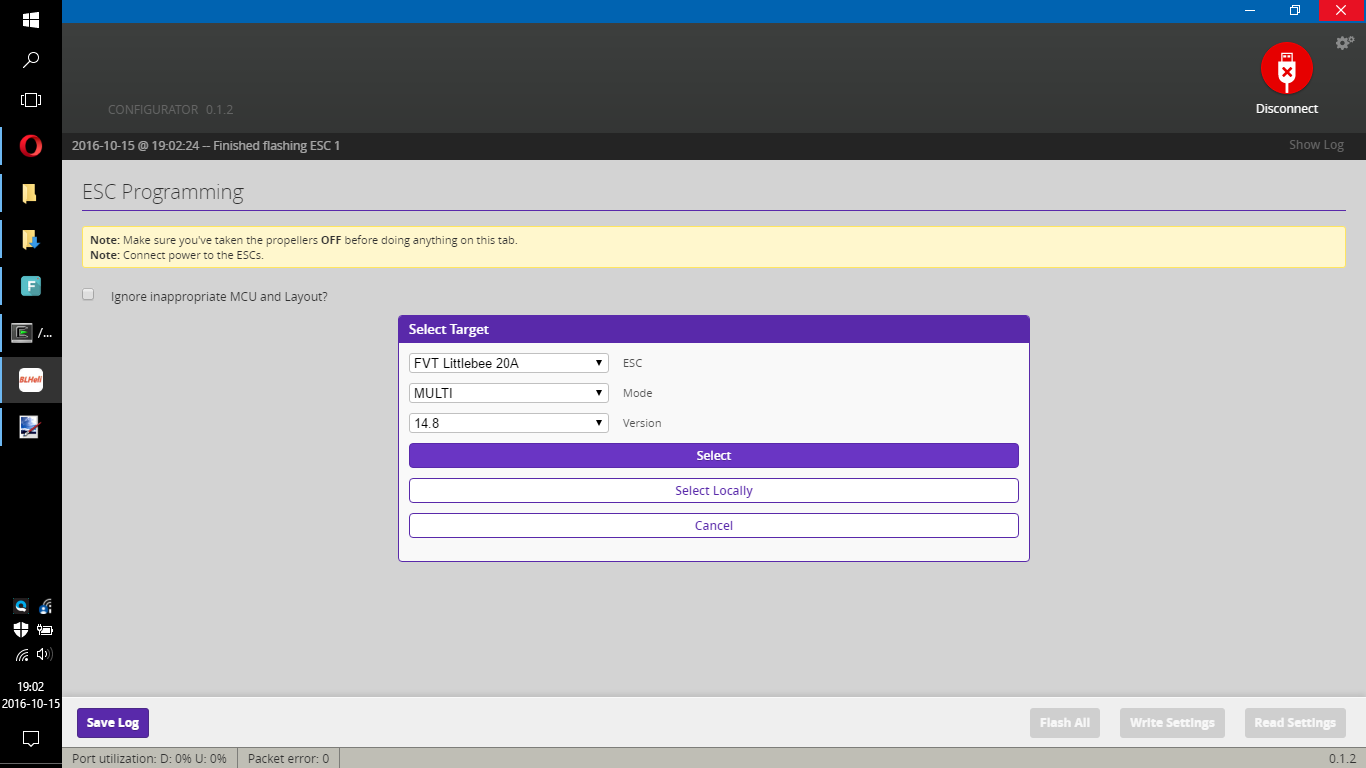
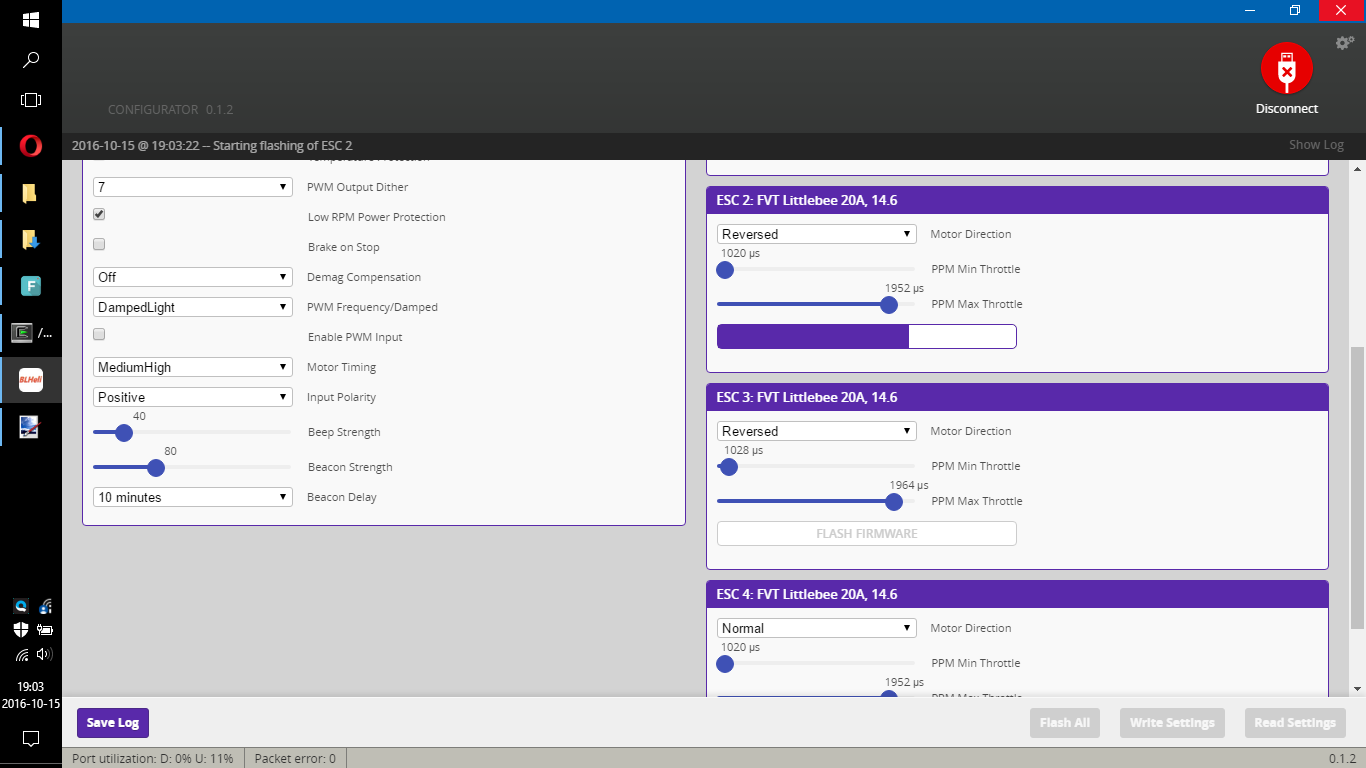
Now, it changed. There is a 3rd party, operating system independent solution to flash and configure ESC with BLHeli. It is called BLHeli Configurator and can be obtained from GitHub.
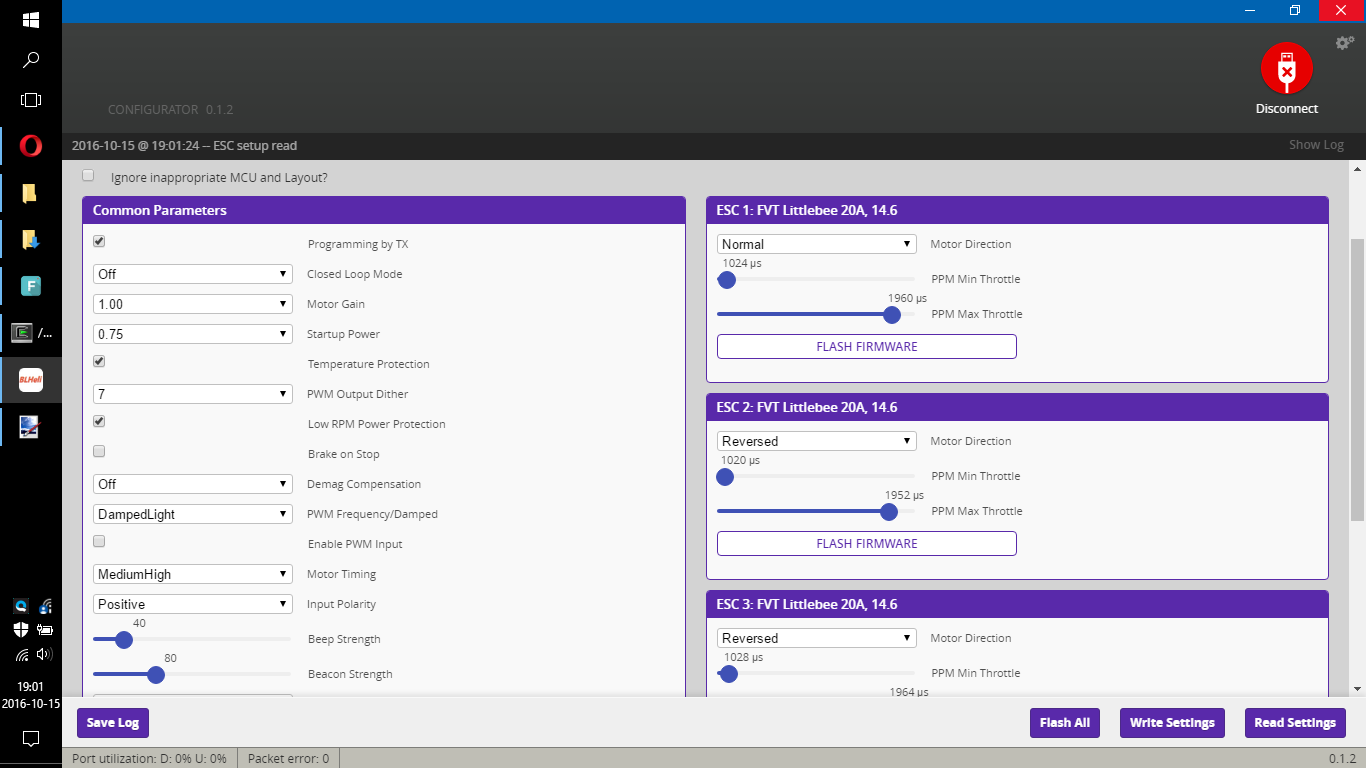
It is not perfect software, but works well. Today I have successfully flashed BLHeli 14.8 to my FVT Littlebee 20A and changed some setting. Awesome.
- BLHeli Configurator is a Chrome application, so it requires Chrome browser
- Only BLHeli passthrough interface is supported. So, ESCs has to be connected to Cleanflight, Betaflight, INAV or TriFlight
- ATM setup requires few commands like
npm installandnpm run build. And that means, NodeJS and NPM are required too - Nor all features are implemented or tested. But is developers will keep the pace, it will be an extremely useful peace of code!
-
3D Printed 35deg camera stand for Runcam HD / Mobius
I have no idea how I was able to build drones before I've bought my 3D printer... I before I've learned basics of 3D design. So, today I present you upgraded version of my Runcam HD / Mobius camera mount I've designed few months ago.
Changes:
- tilt angle increased from 25 to 35 degrees
- allows to use wider zip tie for mounting
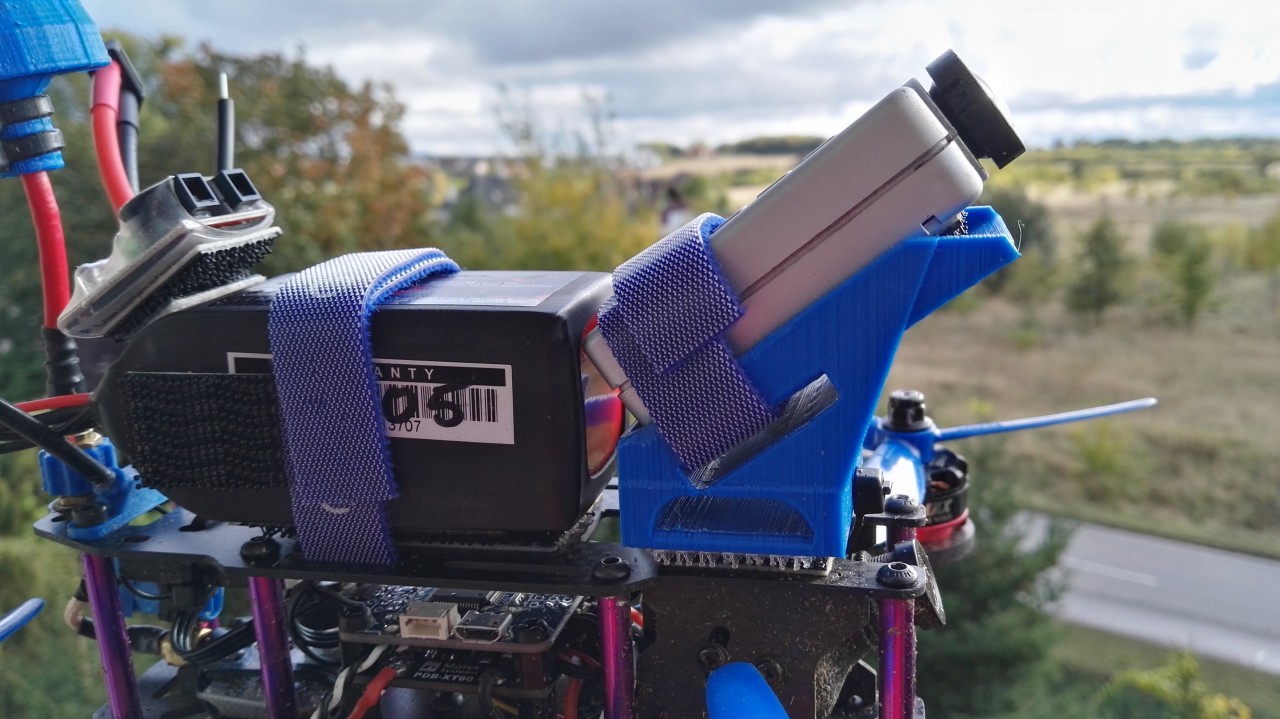
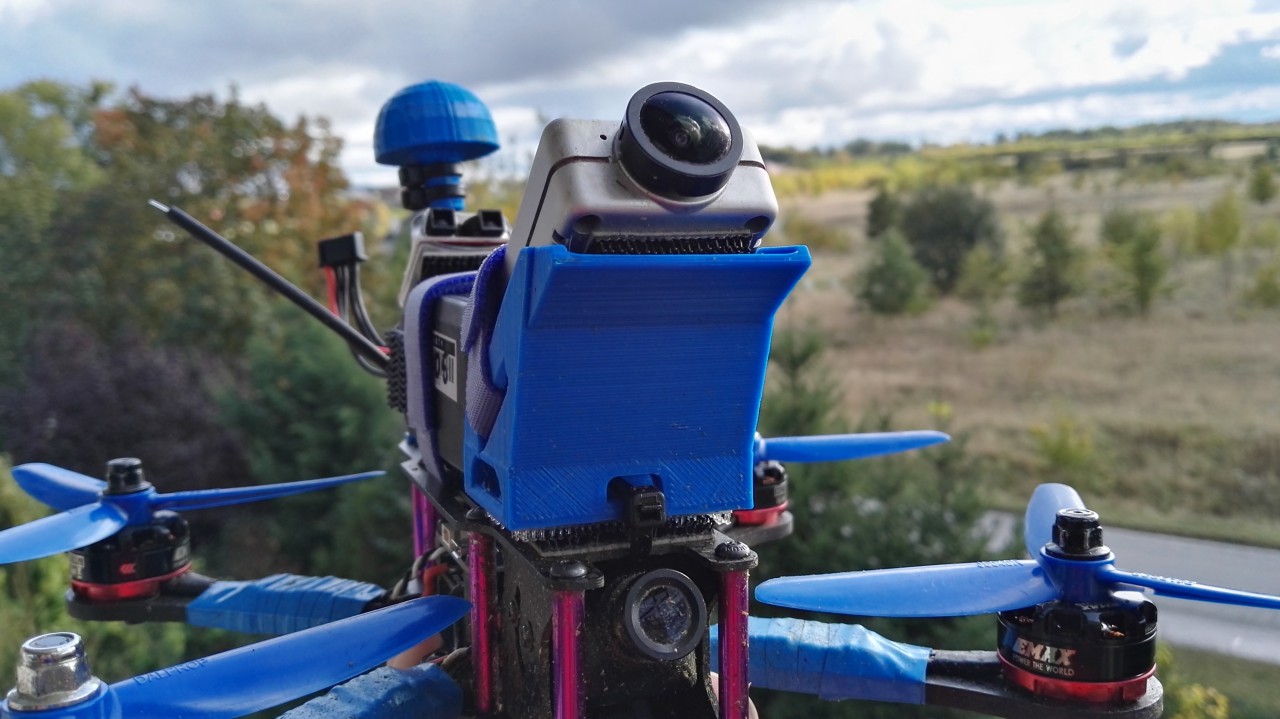
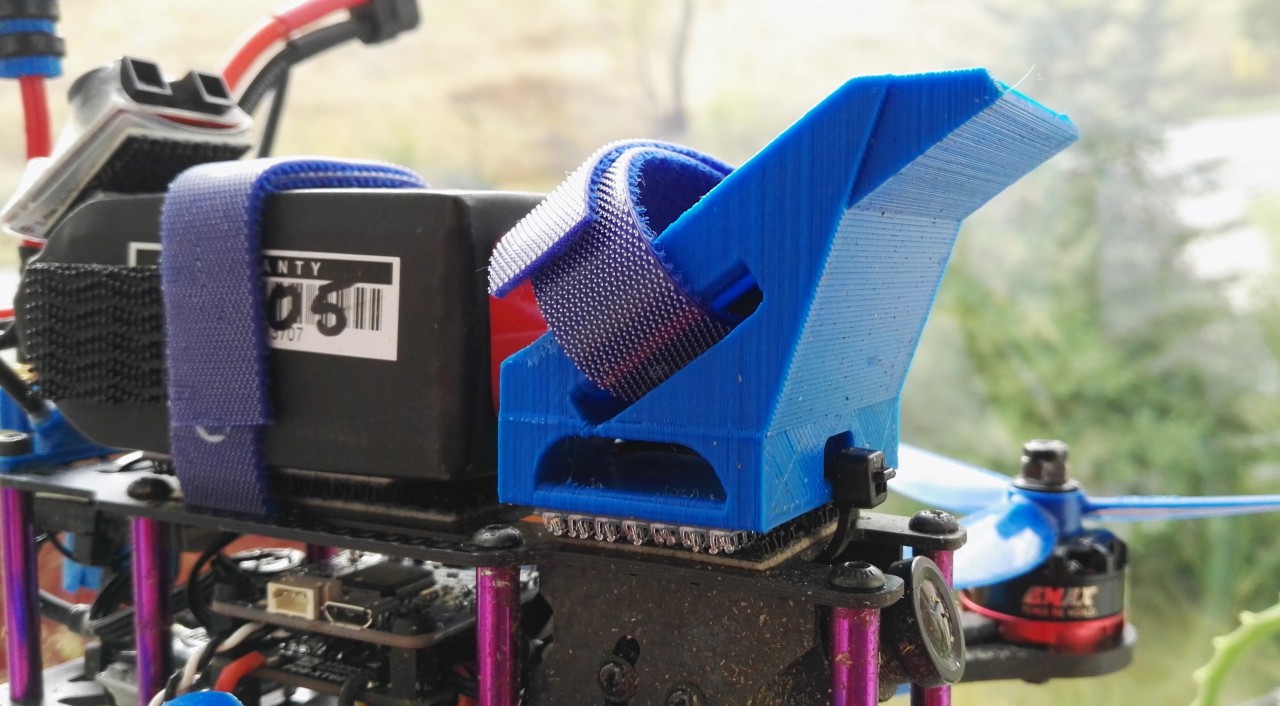
STL file can be downloaded from Thingieverse
Read more... -
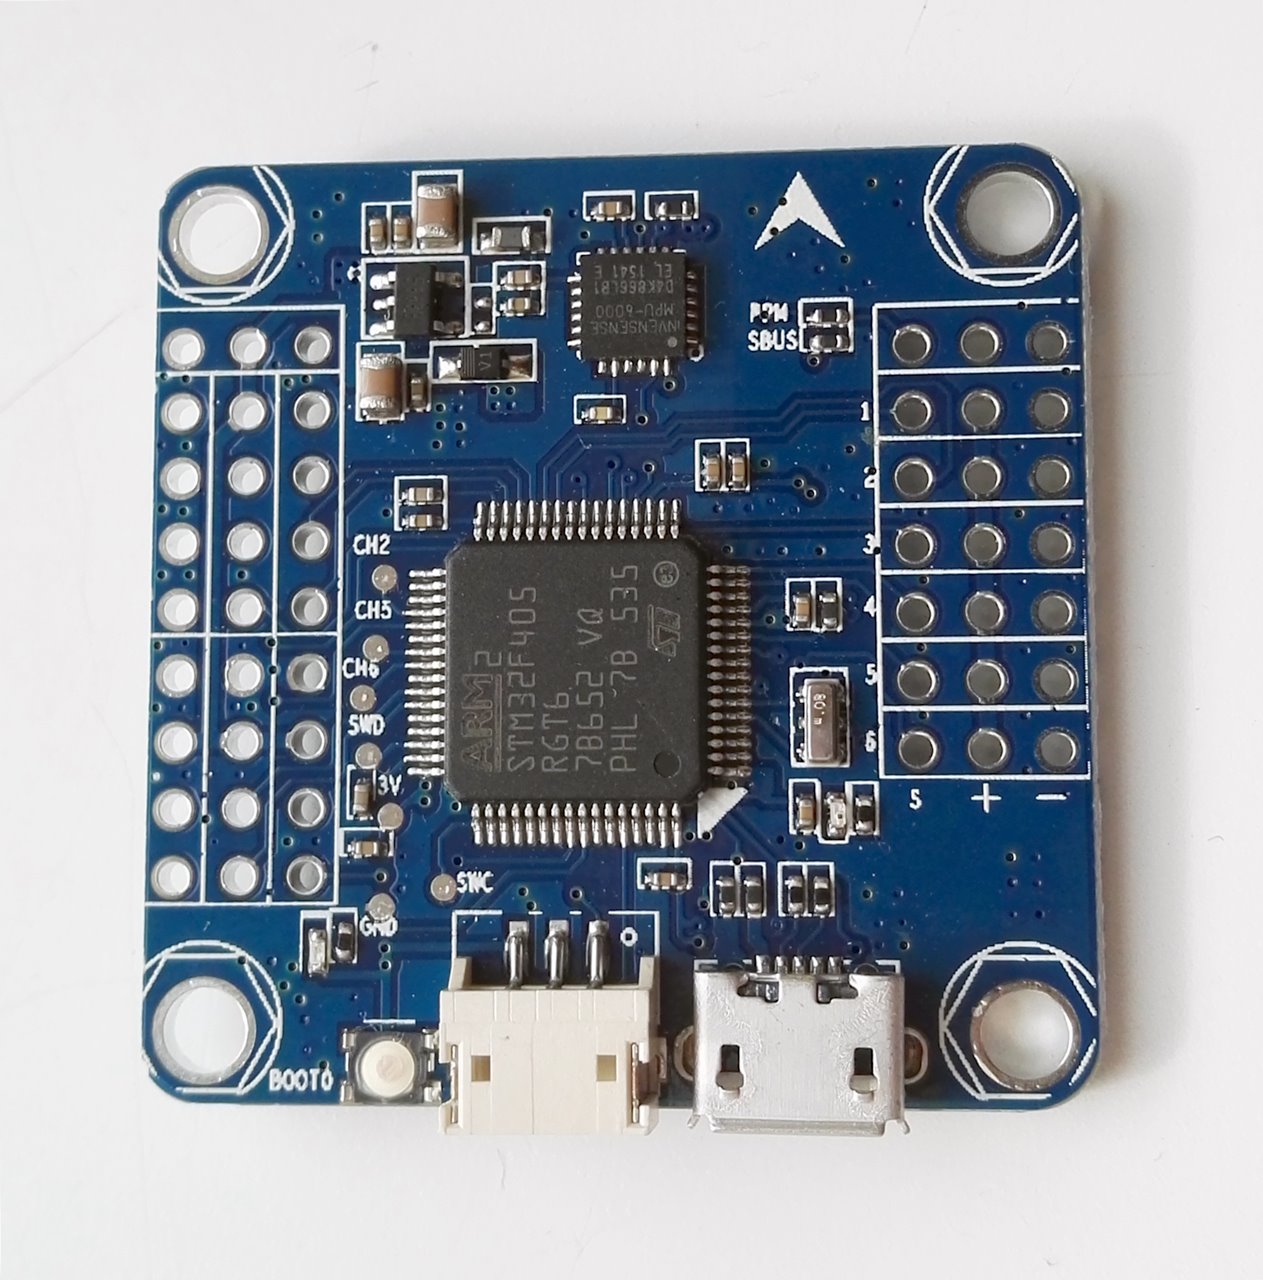
Flip32 F4 / Airbot F4 : Pinout
There is very little reliable information about Flip32 F4 / Airbot F4 on the internet, so I've decided to fix it. Today, pinout map for Flip32 F4 (Betaflight 3.0.1) and some additional notes:
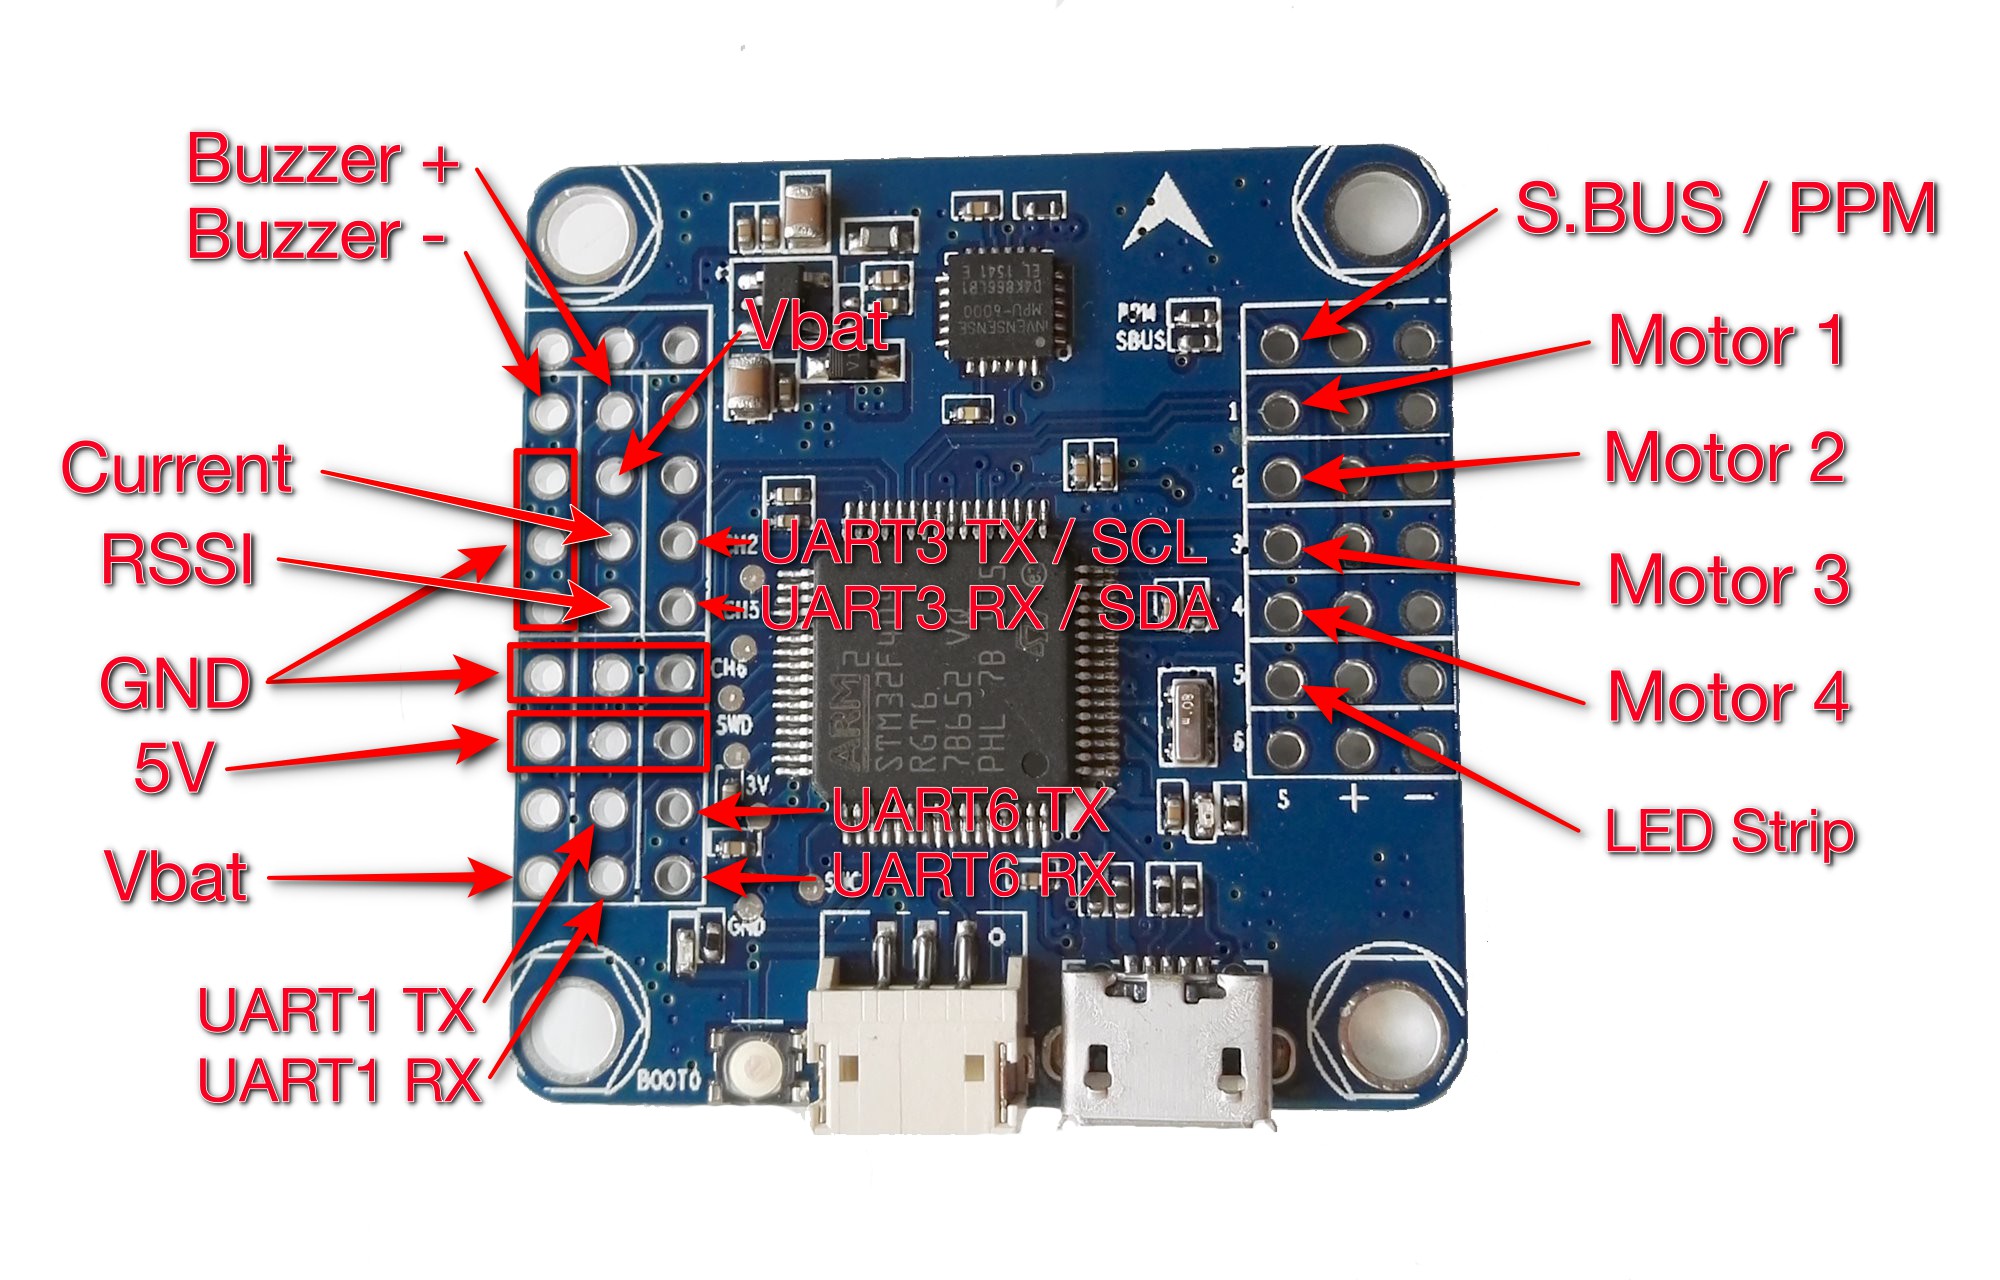
- Betaflight 3: use REVO target
- UART1 is only UART with inverters, so S.BUS can be connected only here
- S.BUS / PPM pin is connected to UART1 RX
- To use PPM, UART1 can not be used
- To use S.Bus, UART1 has to be used as SerialRx
- FrSky S.Port can be used only with UART1 (inverters)
- UART3 is shared with I2C. I2C can not be used when UART3 is enabled
- external I2C is not tested ATM
- Both Vbat lines are connected to onboard 1.5A voltage regulator (BEC)
- Onboard BEC has to be powered if voltage monitoring is used
- Onboard BEC will be disabled only if voltage supplied to ESC lines is higher than BEC output! This is a design flaw! There is no way to force usage of external BEC and still use voltage monitoring!
- I suggest not to supply 5V to OSD from UART header but use external BEC with common ground
-
PID looptime: why it is not only about frequency
Last 18 months was an extremely good period of time for all mini-quad enthusiasts. Progress, hardware and software both, was just incredible. Who could have guessed that in less than 2 years mini-quads will evolve into main group of drones with such excellent flight characteristics. Just take a look at looptime. When I entered the hobby, standard looptime was 3500us (285Hz). Then, someone noticed that mini-quads fly much better when looptime is lowered and it started. Right now, standard looptime is 2000us (500Hz), while Betaflight starts with 1000us (1kHz) or even 500us (2kHz) in case of faster flight controllers.
Just by looking at numbers one might come to a conclusion, that looptime should be kept as low as possible and higher control loop frequency is better. Hey, 2kHz should be twice as good as 1kHz, right? One might even thing that it's really about frequency. Well, this is both false and true: sometimes it is not about frequency, sometimes it is about frequency after all.
-
JJPRO P175 PID tuning values
Like I stated before, default values for JJRC JJPRO P175 are flyable. But there is a huge difference between flyable and flying good.
I've spent few LiPos trying to make it fly just better than on stock values, and here is the most important fragment of CLI dump from my short tuning session.
Changes:
- OneShot125 enabled
- Gyro filtering improvements
- Lower P gains
- Lowered D gains
- Raised I gains
- Raised Rates
feature ONESHOT125

set i2c_highspeed = ON
set gyro_sync = ON
set gyro_sync_denom = 8
set gyro_lpf = OFF
set gyro_soft_lpf = 90

set p_pitch = 32
set i_pitch = 49
set d_pitch = 18
set p_roll = 32
set i_roll = 45
set d_roll = 18

set dterm_cut_hz = 80

set rc_rate = 90
set rc_expo = 65
set rc_yaw_expo = 0
set roll_rate = 70
set pitch_rate = 65
set yaw_rate = 55
Important: those settings apply only to 4S batteries. On 3S PIDs will be probably too low!
Read more...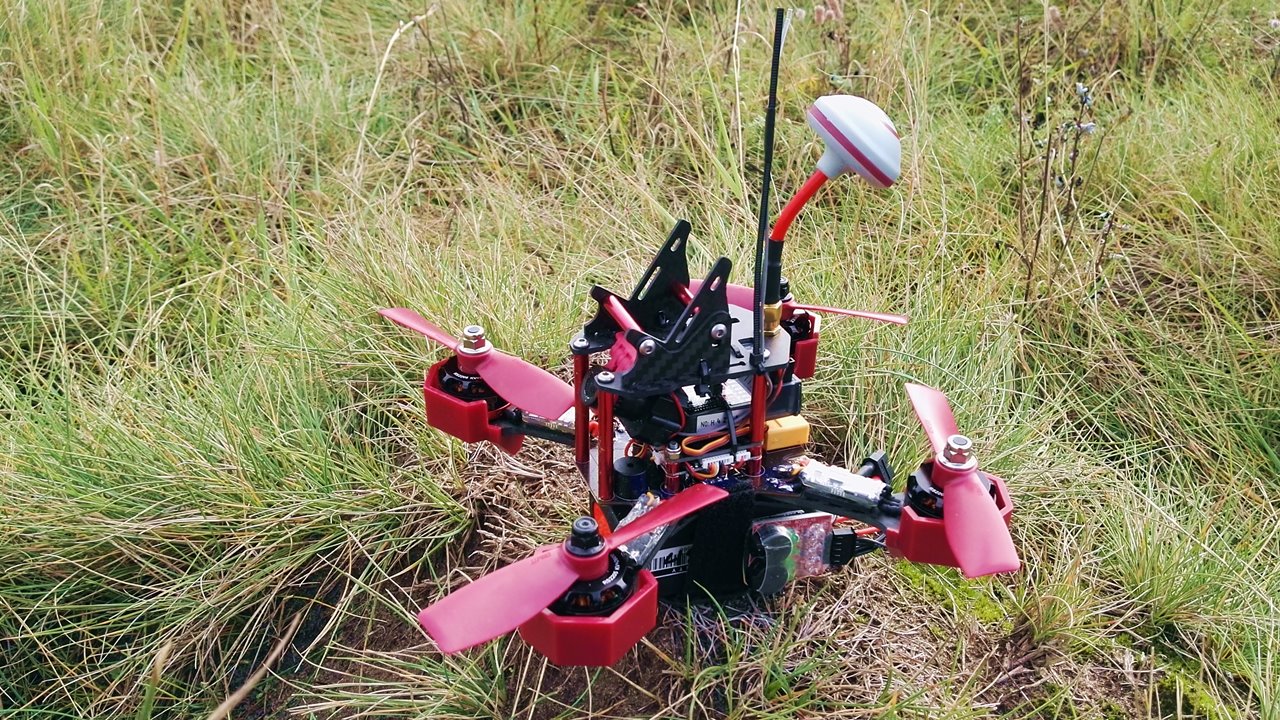
-
Hand on: Flip32 F4 Flight Controller
Yesterday I've received new flight controller for my Reptile X4R 220 quadcopter: Flip32 F4 from ReadyToFlyQuads. This is my first contact with STM32F4 based flight controller and I'm really looking forward to see if it really puts a difference comparing to F3 boards like SPRacingF3 I've been using last few months.
Some features:
- STM32F405 CPU running at 168MHz
- MPU6000 gyro connected via SPI interface
- Integrated 1.5A voltage regulator
- VCP port
- 3 UARTs
Flip32 F4 (and Airbot F4 which is exactly the same board) is supported by Betaflight, RaceFlight (that due to some GPL violations I'm boycotting) and INAV (at the moment of writing this post INAV support is not complete) and REVO target. Well, basically, this board was designed based on OpenPilot Revolution stripped from radio modem, barometer and those JST connectors (pin headers rules!). There are some differences between Revolution and Flip32 F4 in terms of hardware (voltage regulator for example) or separate LED header (which does not work).
There are two "problems" I've discovered so far:
- Whole board is getting very hot. Looks like it's because voltage regulator and battery monitoring are connected. You can not have one without the other even when you have BEC somewhere else
- STM32F4 does not have built in inverters. That means, S.Bus has to be connected to UART1, since this is the only UART with external inverter
Although I've been able to install it on Reptile X4R 220 already, I have no idea how it flies yet. Weather outside is very rainy...
Read more... -
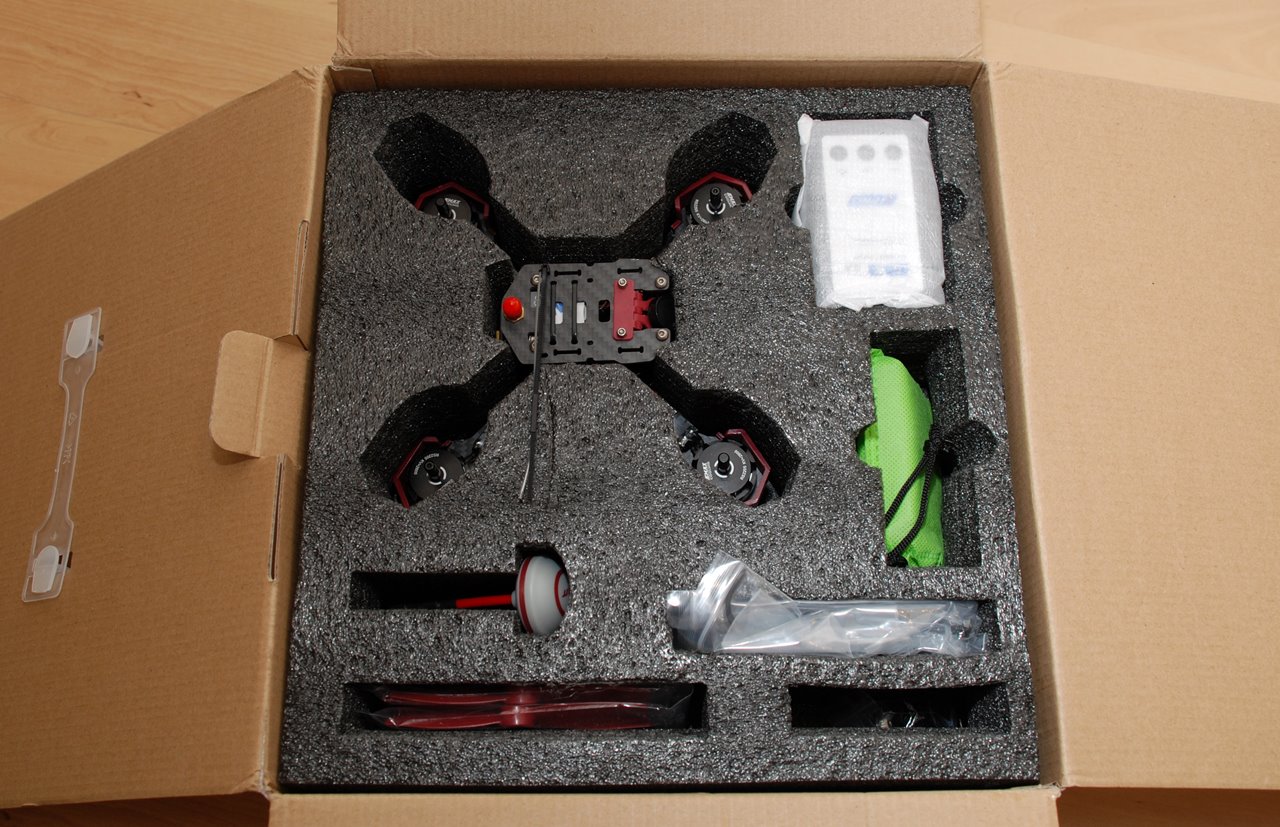
Hands on: JJPro P175 4" mini-quad
Thanks to GearBest I have a new quadcopter to test and review: JJRC JJPro P175 True-X 4" min-quad.
First of all, it is Ready-To-Fly (RTF) product. Everything required to fly is inside white box:

JJPro P175 comes assembled with accessories and radio transmitter:
-
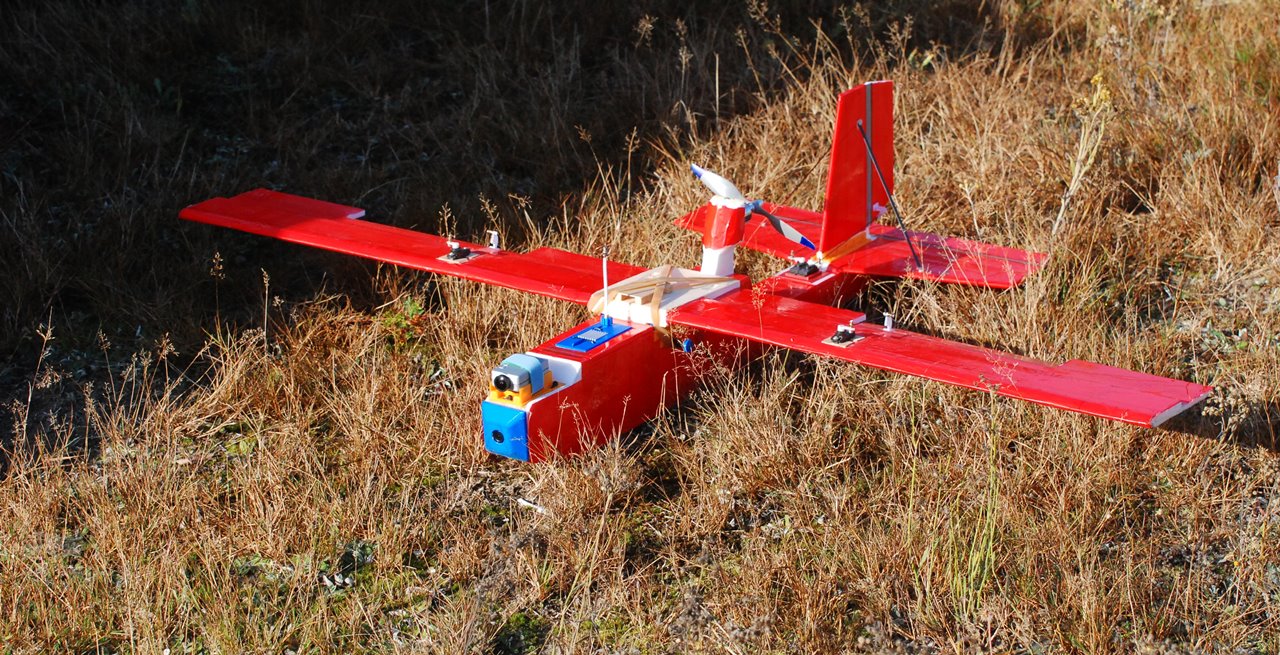
Marabou Stork is so ugly...
My Depron FPV airplane is ugly! Good thing is flies quite well...


Read more...


I'm Paweł Spychalski and I do things. Mainly software development, FPV drones and amateur cinematography. Here are my YouTube channels: