INAV Advanced Accelerometer Calibration: why and how
One of the most often forgotten tasks required to bring the most of INAV, is good accelerometer calibration. Why? While flight controller software like Cleanfligth and Betaflight use accelerometer only to compute UAV's body inclination (Angle and Horizon modes as well as artificial horizon), INAV uses it also for position estimation.
Cleanfligt has to only know where "down" is. For this, simple accelerometer calibration is fully enough: place UAV on a level surface and hit "Calibrate accelerometer" button. Few seconds and done.
INAV not only has to know where bottom is. It also has to know where all other directions are, and how fast UAV is accelerating in those directions to be able to estimate its position. For this, advanced, or 6 point accelerometer calibration is required.
How to perform Advanced Accelerometer Calibration [AAC]
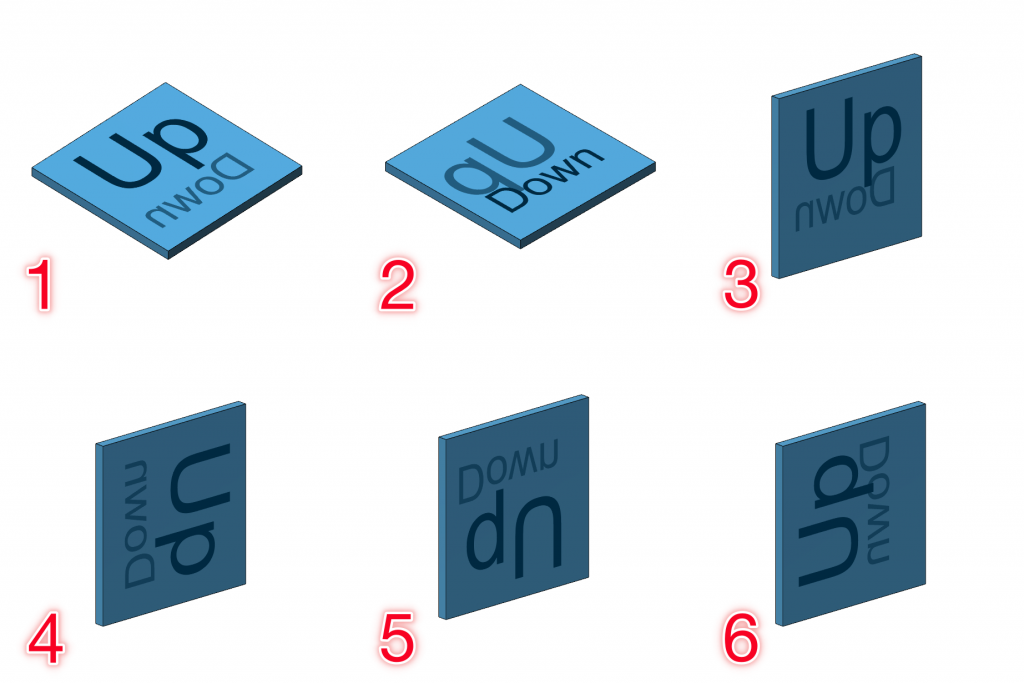
During AAC, each side of flight controller has to be positioned "down" during calibration. Order is not important with one exception: during first step, top of flight controller has to positioned up. This is impotrant: we are calibrating accelerometer, not whole UAV. Even is FC is mounted upside-down, during first step, FC has to to positioned upwards.
- Prepare stable surface that will allow to keep FC stable in all required positions. Angles does not have to be super precise, even few degrees should be enough, but flight controller has to be motionless during calibration
- Plug-in USB and connect to INAV Configurator
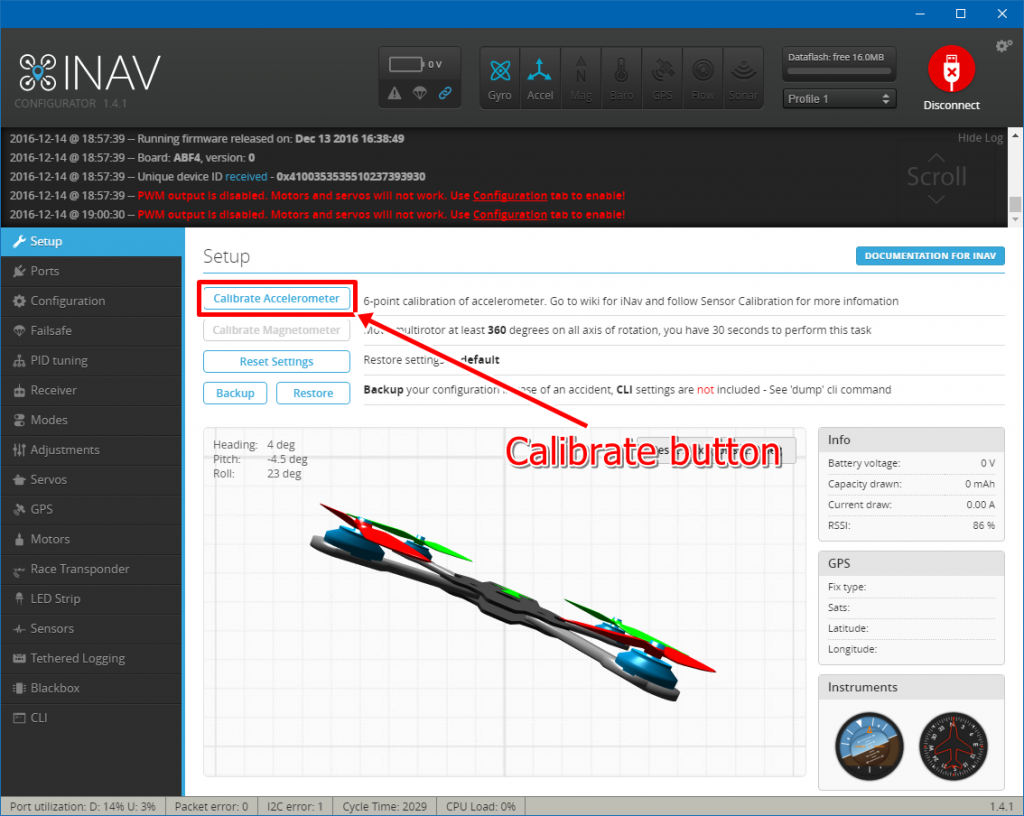
- Position flight controller facing up and hit "Calibrate acccelerometer" button. Wait for success message
- Rotate FC 180 degrees so it is bottoms-up and hit "Calibrate acccelerometer" button. Wait for success message
- Rotate FC so its rear edge is facing down and hit "Calibrate acccelerometer" button. Wait for success message
- Rotate FC so its right edge is facing down and hit "Calibrate acccelerometer" button. Wait for success message
- Rotate FC so its front edge is facing down and hit "Calibrate acccelerometer" button. Wait for success message
- Rotate FC so its left edge is facing down and hit "Calibrate acccelerometer" button. Wait for success message
- Disconnet and power down
- Advanced accelerometer calibration is done. If is succeeded,
acczero_x,acczero_yandacczero_zshould different than0, whileaccgain_x,accgain_yandaccgain_zshould be different than4096
Worth remembering: calibration values can be restored via CLI when flight controller firmware is updated. It is hardware, not software dependent. Calibration should be executed when new hardware is used.

I'm Paweł Spychalski and I do things. Mainly software development, FPV drones and amateur cinematography. Here are my YouTube channels:


